Megaleecher.Net

Making technology work for you...

Get Your Free Subscription By Email:

Raspberry Pi

Compiling the latest version of aria2 download manager on Raspberry Pi

Installing and Configuring MiniDLNA Server On Raspberry Pi

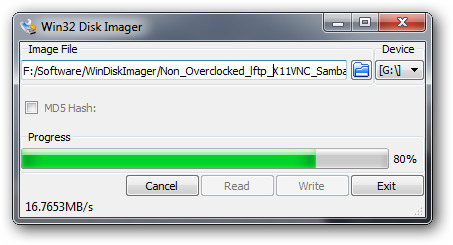
We have already setupped the Raspberry Pi to download files from internet and share them wirelessly over network acting as an NAS. Now it's time to further enhance this functionality to share multimedia content (audio/video/images) using DLNA protocol so our Raspberry Pi can act as an self contained multimedia downloader and server.

Enabling DLNA allows compatible networked device like TV's, cellphones, music systems and computers to enable seamless sharing and playback of digital media between devices. DLNA uses Universal Plug and Play (UPnP) for media management, discovery and control. Follow the instructions ahead to install and configure popular Linux DLNA server utility MiniDLNA on Raspberry Pi running Raspbian.

DLNA server detected by Sony Bravia

aria2 - The Best Lightweight, Multi-protocol, Multi-source Download Accelerator For Linux

In search for the most stable yet low resource consuming download accelerator for my Raspberry Pi NAS, we have tested and written about excellent utilities like Transmission Bittorrent Client, pyLoad and FatRat which gets the job done. However, after extensive testing with all these I can now easily conclude that the best download manager for Raspberry Pi (or any other low-resourced Linux computer) is - aria2.

aria2 is an versatile multi-platform, multi-protocol download accelerator with lots of powerful features not available in any of the competing applications like the ability to download the same file from multiple URLS and protocols. Aria2 is available for Linux, Windows and Mac and supports multi-protocol, multi-segmented parallel accelerated downloads from HTTP,HTTPS,FTP,BitTorrent and Metalink protocols with download resume capability. Despite being a lightweight command line utility, you won't feel the lack of an GUI as it supports an XML-RPC interface for remote-control - there are quite a few handy GUI's available like web-interfaces, desktop clients and native mobile applications.

aria2

Autostarting Applications and Scripts After Launch Of LXDE GUI

We can launch applications and scripts as services during boot at various Linux run-levels as demonstrated earlier, however at-times we need to launch applications or perform scripted tasks only after the Graphical interface is loaded. For example in my usage scenario with Debian running on a Raspberry Pi, few services were failing to work as expected when launched using inti.d method as they require the host to be properly connected to the internet which only happened (in my usage scenario) after the GUI started loading.

Here is another handy way to auto-launch applications and scripts in a similar manner to "autostart" in Windows, we will be using LXDE "/home/pi/.config/autostart" folder to create shortcuts which will launch our executable after GUI starts loading.

LXDE autostart

Launching Scripts and Applications on Raspberry Pi Boot

Users world-over are tweaking there way into Raspberry Pi making multitudes of things, like low energy consuming dedicated downloader, media center, Network Attached File-server (NAS), weather station, home-automation and robotics. To do all this tinkering, you will frequently need to make sure applications are launched when the Raspberry Pi is restarted.

Follow this simple tutorial to create services which will automatically launch at Debian boot. We will be using the Linux standard init.d method to launch our applications as services during various run-levels.

init.d folder

Installing and using the Watchdog Timer on Raspberry Pi

watchdogIn it's simplest definition watchdog is a hardware and/or software timer-register which can used to trigger an system reset or action if something doesn’t works as expected. The watchdog timer performs regular heartbeat checks and if failed performs the pre-defined corrective tasks.
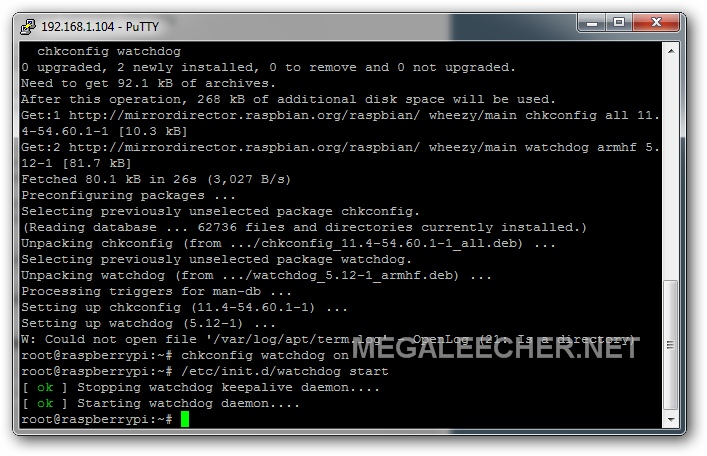
The now hugely popular mini-computer Raspberry Pi features the BCM2835 SoC which has an built-in hardware watchdog timer, this can be used to check tasks like network connectivity, system load, system freeze and other metrics like temperature to perform corrective measures like automatic system reset. Just follow the steps as instructed next to get started with using watchdog timer.

RasPi Watchdog

Connecting to internet using an EVDO modem on Linux

EVDOEVDO is the 3G internet access technology for CDMA platform, the Evolution-Data Optimized(EVDO) technology offers mobile broadband speeds upto 3.1 Mbit/s.

I have been providing internet access to my Raspberry Pi via an TP-Link WiFi 3G Router, however we can directly connect a GSM/EVDO 3G dongle to any Linux computer and make it act like a WiFi access point using Linux utilities like WICD Network Manager. Configuring a EVDO modem to work on Linux can get a bit tricky, here is a simple to follow howto guide on setting things up.

WVDIAL EVDO

Best Methods to Backup the Raspberry Pi SD Card

Once fully configured according to your custom needs it's a good idea to create an raw image backup of your Raspberry Pi SD Card setup, once backed-up a user simply need to re-image the card in-case the underlying operating-system or filesystem gets corrupted. There are various methods to backup and restore the Raspberry Pi SD card, we reviewed all and here are the best options to get the task completed in shortest time with smallest file-size.

The most widely used Windows utility for RAW image backups and restores Win32 Disc Imager is an easy to use option but the resulting file-size is bigger as it is uncompressed, using any popular compression format results in smaller backup size as shown below. However, this approach consumes more time and requires manual efforts twice.

Win32 Disk Imager
SD Card Backup

Installing VNC server on Raspberry Pi for remote desktop functionality

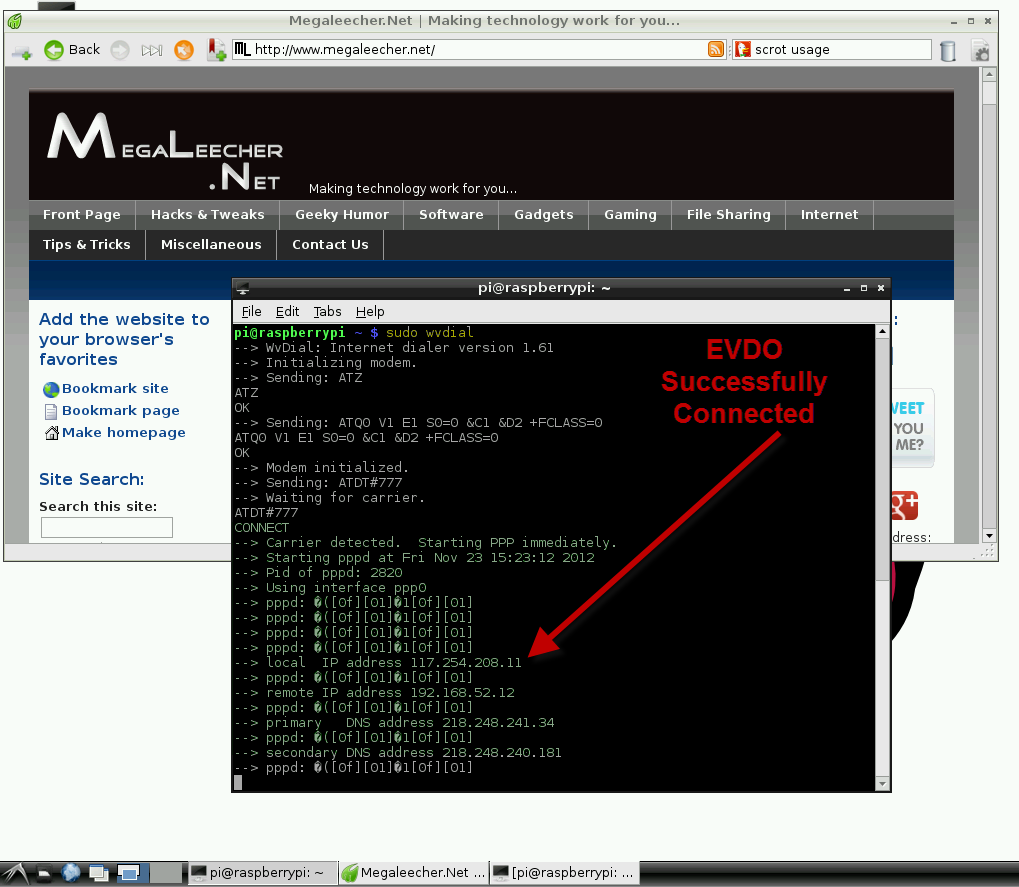
Majority of the users must be using their little Raspberry Pi computer headless (without any keyboard, mouse or display attached), and while SSH is a great option for Linux users feeling comfortable with command line other users need an graphical user interface. Here is an quick tutorial to remotely access your Raspberry Pi's desktop remotely over an network.

Remote VNC Desktop

Detecting IP address of Raspberry Pi on your network

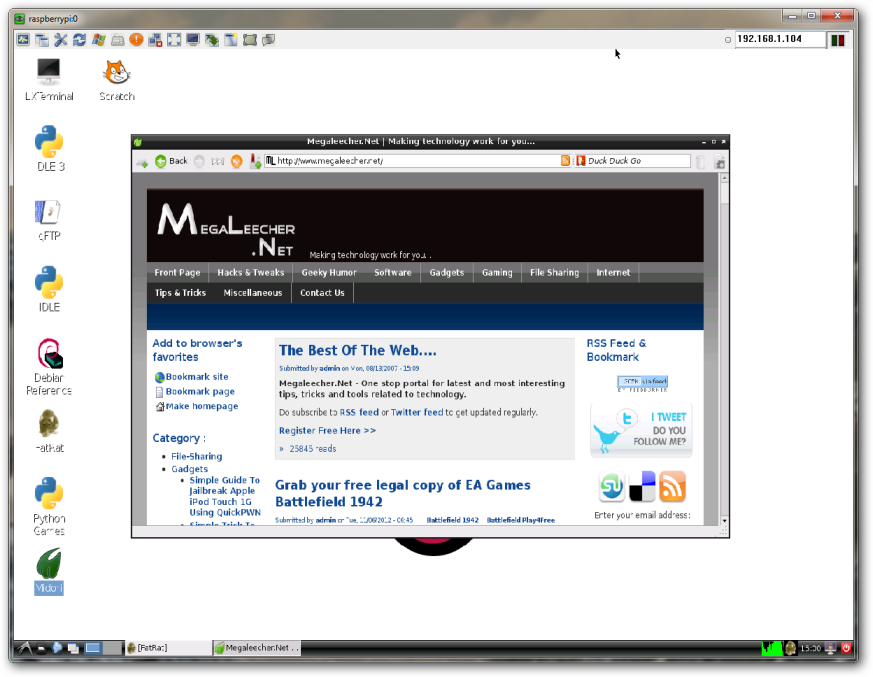
While it's a better idea to allocate an static or fixed IP address to your Raspberry Pi, here is a simple trick to find the DHCP allocated IP address to your RasPi on a network. This specially come handy when you are trying to connect to RasPi remotely via SSH or VNC and don't know the dynamic IP it is currently active on.

This is just one of the many helpful tips we have posted, You can find more stories here,
Do subscribe to updates using your favorite RSS feed reader or using the secure FeedBurner email update form on top of this post.