Combine the awesomeness of Apple's Siri voice recognition capability with ability to tap into it using SiriProxy, and our favorite hacker friendly mini Linux computer Raspberry Pi and we have an excellent voice controlled home automation system which runs 24/7 waiting for voice commands to do assigned tasks. To get this super-geeky project working we need to install and configure SiriProxy on our Raspberry Pi setup, follow the instructions shared below to install SiriProxy on the official Raspbian “wheezy” distribution.

Step-by-step instructions to install, configure and use SiriProxy on Raspberry Pi:
- Make sure you are running root.
- Make sure you have SSH working with a Static IP.
- Since, we will be intercepting DNS queries to Apple Siri Servers make sure we break the looping DNS redirects using
nano /etc/resolv.conf
and editing it with following entries - the older entry which should be pointing to your router should be commented or removed :
- Install DNSmasq DNS server which will do the request interception for the hack to work using
sudo apt-get install dnsmasq
.
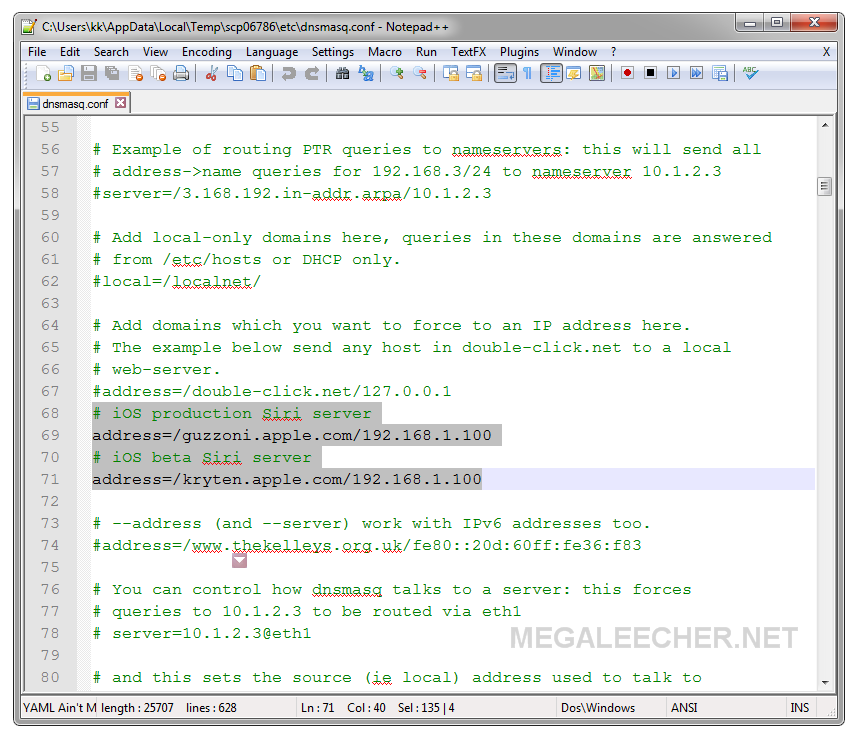
- Edit
/etc/dnsmasq.conf
file by adding the lines below for intercepting the requests to Apple Siri server and route them through our locally running SiriProxy handler. Make sure you use your RPi static ip instead of [CHANGE_TO_YOUR_RPI_STATIC_IP] shown below.
- Restart DNSMasq using
/etc/init.d/dnsmasq restart
.
- Install all the requirements using :
- Now install RVM using
curl -L https://get.rvm.io | bash -s stable --ruby
, this will take quite a while.
- Update
.bashrcusing:
[[ -s "/etc/profile.d/rvm.sh" ]] && . "/etc/profile.d/rvm.sh" echo '[[ -s "/etc/profile.d/rvm.sh" ]] && . "/etc/profile.d/rvm.sh" # Load RVM function' >> ~/.bash_profile . ~/.bashrc
- Now, we will install and setup Ruby 2.0.0 using :
- Install and setup SiriProxy GEM (package) using :
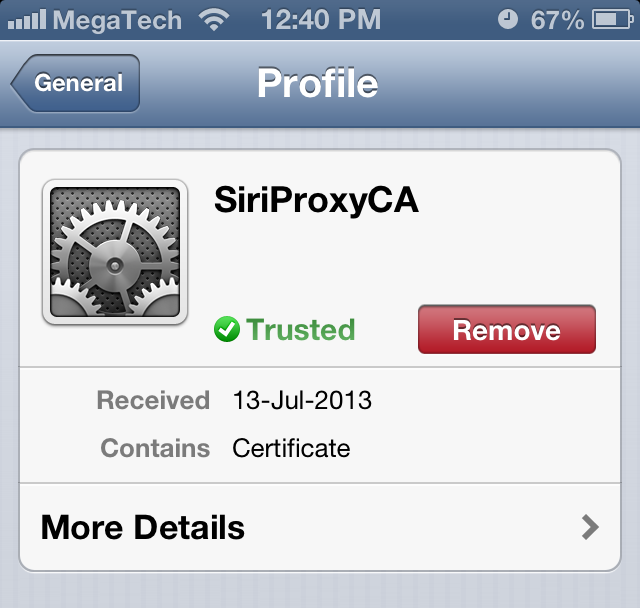
- Transfer this certificate to your phone (it will be located at ~/.siriproxy/ca.pem) by emailing it and opening the email on your phone. On the iPhone simply tap the email attachment and follow the prompts to install.
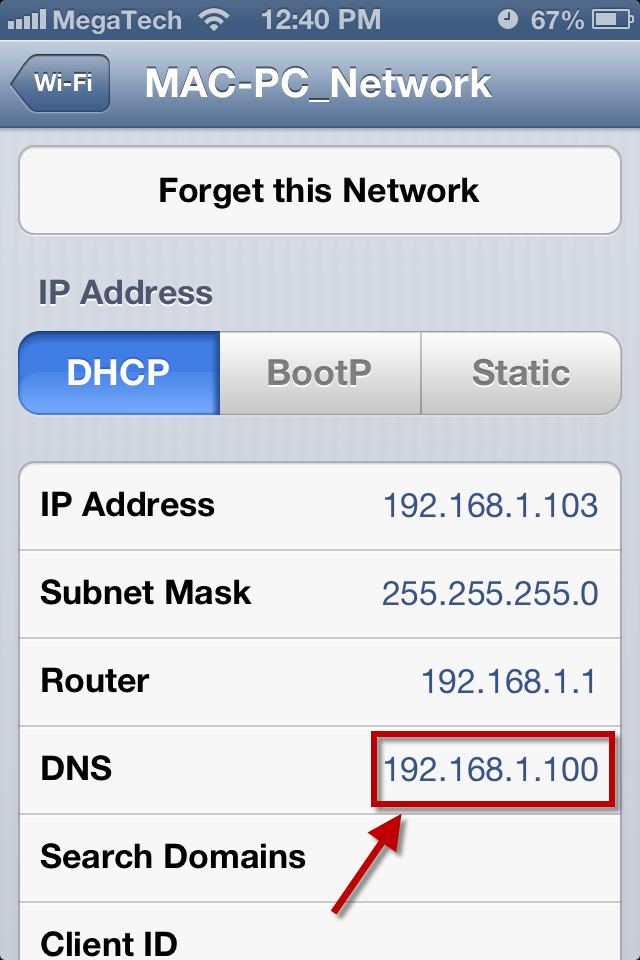
- Configure your iPhone WiFi to use our DNSMasq server installed on Raspberry Pi by navigating to Settings->WiFi->[Your WiFi Access Point Name]->DNS, change this to your Raspberry Pi static IP.
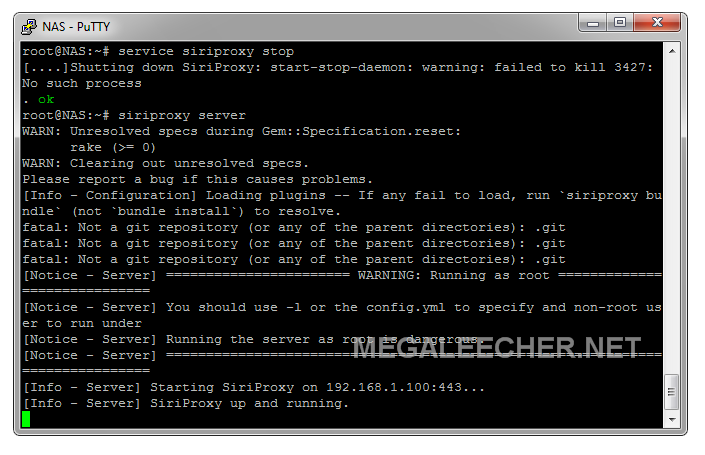
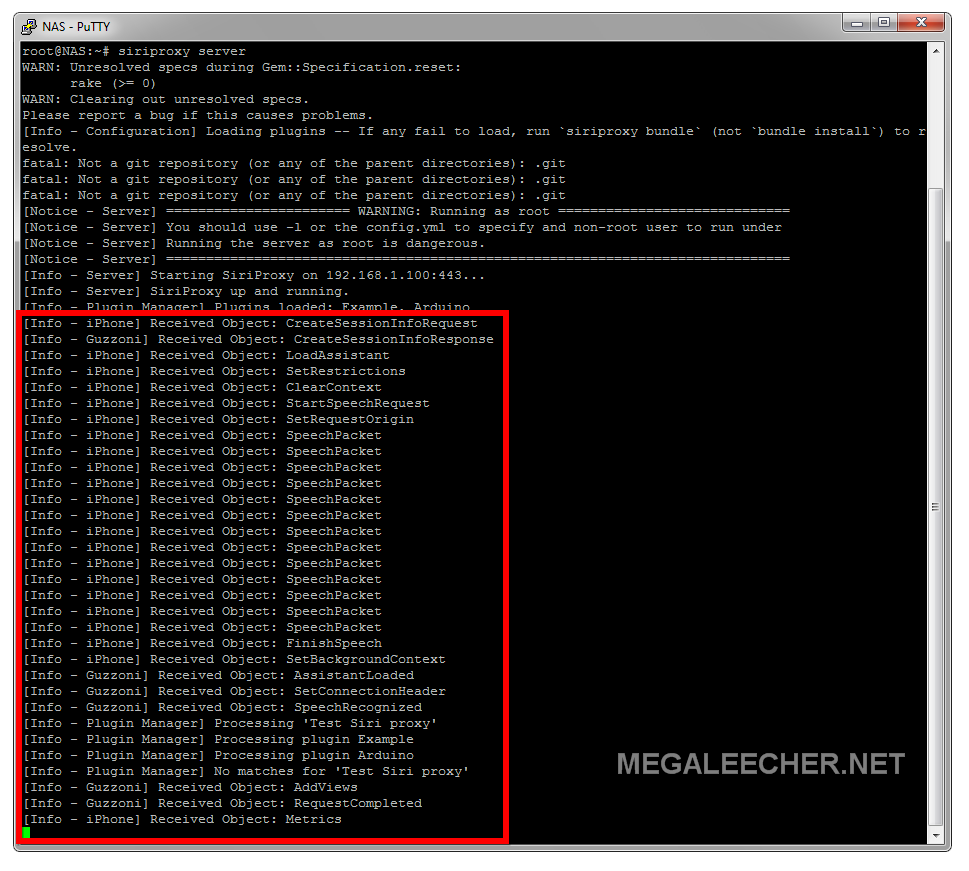
- We are now all set, start siriproxy using :
siriproxy server
and it should look like this ready to listen for commands.
- To test, launch Siri on your phone and speak test siri proxy. The terminal window running SiriProxy will show activity capturing the request and reply with Siri Proxy is up and running!.
- To stop the server type CTRL+C at the terminal.
# Google public DNS servers
nameserver 8.8.8.8
nameserver 8.8.4.4
# Old iOS production Siri server
address=/guzzoni.apple.com/[CHANGE_TO_YOUR_RPI_STATIC_IP]
# New iOS beta Siri server
address=/kryten.apple.com/[CHANGE_TO_YOUR_RPI_STATIC_IP]
apt-get install ruby build-essential openssl libreadline6 libreadline6-dev curl git-core zlib1g zlib1g-dev libssl-dev libyaml-dev libsqlite3-dev sqlite3 libxml2-dev libxslt-dev autoconf libc6-dev ncurses-dev automake libtool bison subversion pkg-config -y
rvm install 2.0.0
rvm use 2.0.0 --default
gem install siriproxy
mkdir ~/.siriproxy
Generate the certificates for our iPhone to fake Apple SSL.
siriproxy gencerts
Comments
Now, that's something seriously amazing...
Thanks for sharing this, I was wondering is there anything similar on Android. I mean "Siriproxy for Android" ?
Add new comment