Megaleecher.Net

Making technology work for you...

Get Your Free Subscription By Email:

Linux

Installing, Configuring and Using Raspberry Pi as a Torrent Downloading Server

BitTorrent is without a doubt the most popular file-sharing method out there, Peer-2-Peer (P2P) torrent downloading requires a computer which runs a torrent downloading client to fetch content from other users sharing it. Torrent downloading can be slow as speeds depends on swarm sharing the content, this means you need to have your computer powered-on consuming electricity. Luckily, we can now use our ultra-cheap Raspberry Pi to get the job done 24x7 - consuming just 5w of power.

After completing the basic setup of the Raspberry Pi, networking it to internet, attaching an external HDD and configuring it to work as an Network Attached Storage (NAS) we all all set to install the cross-platform Transmission Torrent Client of the RasPi to get our cheap seedbox working.

Transmission torrent cleint web-interface from Raspberry Pi

How to update the Raspberry Pi firmware

The Raspberry Pi software can be divided into three core components - the closed-source GPU firmware, the modified ARM Linux Kernel (which controls how the CPU is utilized) and the software installed by the user. The GPU firmware and Kernel are regularly updated by the RasPi core team to fine-tune stability and performance of the little computer. Here is a simple utility to download and install these firmware and kernel updates in an automatic, user-friendly manner.

RasPi Maintenance

How to shutdown and reboot the Raspberry Pi

Raspberry Pi does not feature an power on/off button, if it's receiving power it's ON and if not OFF. However, it is required to do a graceful shutdown or reboot as to prevent any operating-system corruption. Rebooting and Shutting down Raspberry Pi can easily be achieved by using "sudo reboot" (sudo if not using the root account) and "sudo shutdown -hP now" at the terminal. These commands can also be used over SSH terminal if you are running your RasPi headless (without a screen attached) or remotely over network.

sudo shutdown -hP now at RasPi terminal

How to attach and configure an external hard-disk to RasPi and share it over network

In the last RasPi tutorial, we configured the device to have an static IP on the network. Now, its time to add an external storage to the Pi - in this tutorial we will be adding an removable 500 GB USB harddisk drive to our mini-computer and share it over network for wireless access using Samba server.

RPI and external HDD

Assigning Static IP Address to Raspberry Pi

After completing internet connectivity setup on Raspberry Pi, it's time to setup a fixed/static IP so we can access it easily over a network via SSH and VNC.

To get this done we will be using another popular, simple to use, graphical WiFi Network management Utility for Linux - WICD Network Manager. Just follow the steps below to install and configure an static IP on your Pi.

WICD Network Manager

Easiest method to setup Wi-Fi connectivity on Raspberry Pi

After initial setup of the Raspberry Pi, it's time for an internet connection. While using Internet over Ethernet is just plug-n-play business on Raspberry Pi, setting-up an Wireless connection takes a little more effort.

To get started with WiFi, first we need to connect an supported USB WiFi dongle to the Pi. Make sure you are using an Powered USB Hub (shown in the picture below) as Raspberry Pi is not able to reliable power multiple USB devices, follow the instructions next to configure your WiFi dongle on the Pi.

Raspberry Pi WiFi Connection Setup

Fixing the 100% rootfs usage on Raspberry Pi and errors resulting due to that

While a lot of graphical user-interfaces and utilities are available for Linux, there are times when one needs some command line skill sets to get things going. After installing my Raspberry Pi with an Debian operating-system and using the popular "X Window System" to manage it, things went bad today as the "startx" command failed to load the graphical user-interface. Upon digging up through terminal using "df -h" command, it was clear there was no space left on the rootfs partition which was causing "X" to fail loading.

It needs to be noted that the official Raspberry Debian Wheezy Image does not partition the SD card to it's full capacity, and we need to do that later as instructed ahead. Extending the root partition to utilize full-space will also get rid of application launch errors caused due to non-availability of disk space in rootfs partition.

SD Card Full

BerryBoot - The simplest way to install and load multiple operating systems on a Raspberry Pi

The revolutionary cheap and small Raspberry Pi mini computer is so popular now it hardly needs an introduction. After assembling all the bits and pieces needed to run an RPi, you will need to format and load the SD card with an compatible linux operating system of your choice. Here is easy and fast way to get this done.

My Raspberry Pi

Bake Your Own Custom Android ROM Online Using RomKitchen

rom kitchenThe best thing about open-source software is that custom version of them can be created and shared provided that you have the required technical knowledge, we have earlier blogged about the online custom Linux distro maker SUSE Studio making things easier for non-programmers and today we have something on the similar lines but for Google Android.

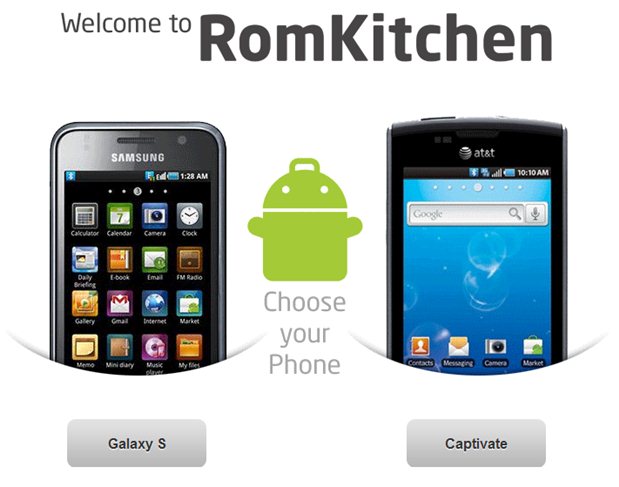
As the name suggest "RomKitchen" allows users to customize, compile and download there own version of Google Android OS by doing everything online in less than 5 minutes, the free online customization service supports only Samsung Galaxy S and Captivate as of now and allows users to pick there choice of Base ROM, Kernel, Modem, CSC, Apps, Tweaks, Themes and Boot Animation (coming soon) offering the most easy-to-use, personal custom android rom experience.

Android ROM Kitchen

How To Exclude Files Or Folders From An cPanel/WHM Backup Job

Being a server administrator requires some good tech skills as you face various scenarios requiring not-so-commonly used solutions, few days ago I faced a similar situation where a certain directory was needed to be skipped from regular WHM/cPanel backups. Luckily WHM/cPanel do provide a simple cpbackup-exclude.conf file which can be edited to exclude files and directories from the backup job, all that needs to be done is to input and save paths to items to be excluded via Shell/WinSCP.

cPanel Backup Config File Location
This is just one of the many helpful tips we have posted, You can find more stories here,
Do subscribe to updates using your favorite RSS feed reader or using the secure FeedBurner email update form on top of this post.